AM32 Development Setup
This tutorial works for Windows, Linux, and MacOS
Video Tutorial
Build AM32 Bootloader from source
-
Download vscode and install extension, cortex-debug, makefile-tools(optical)
-
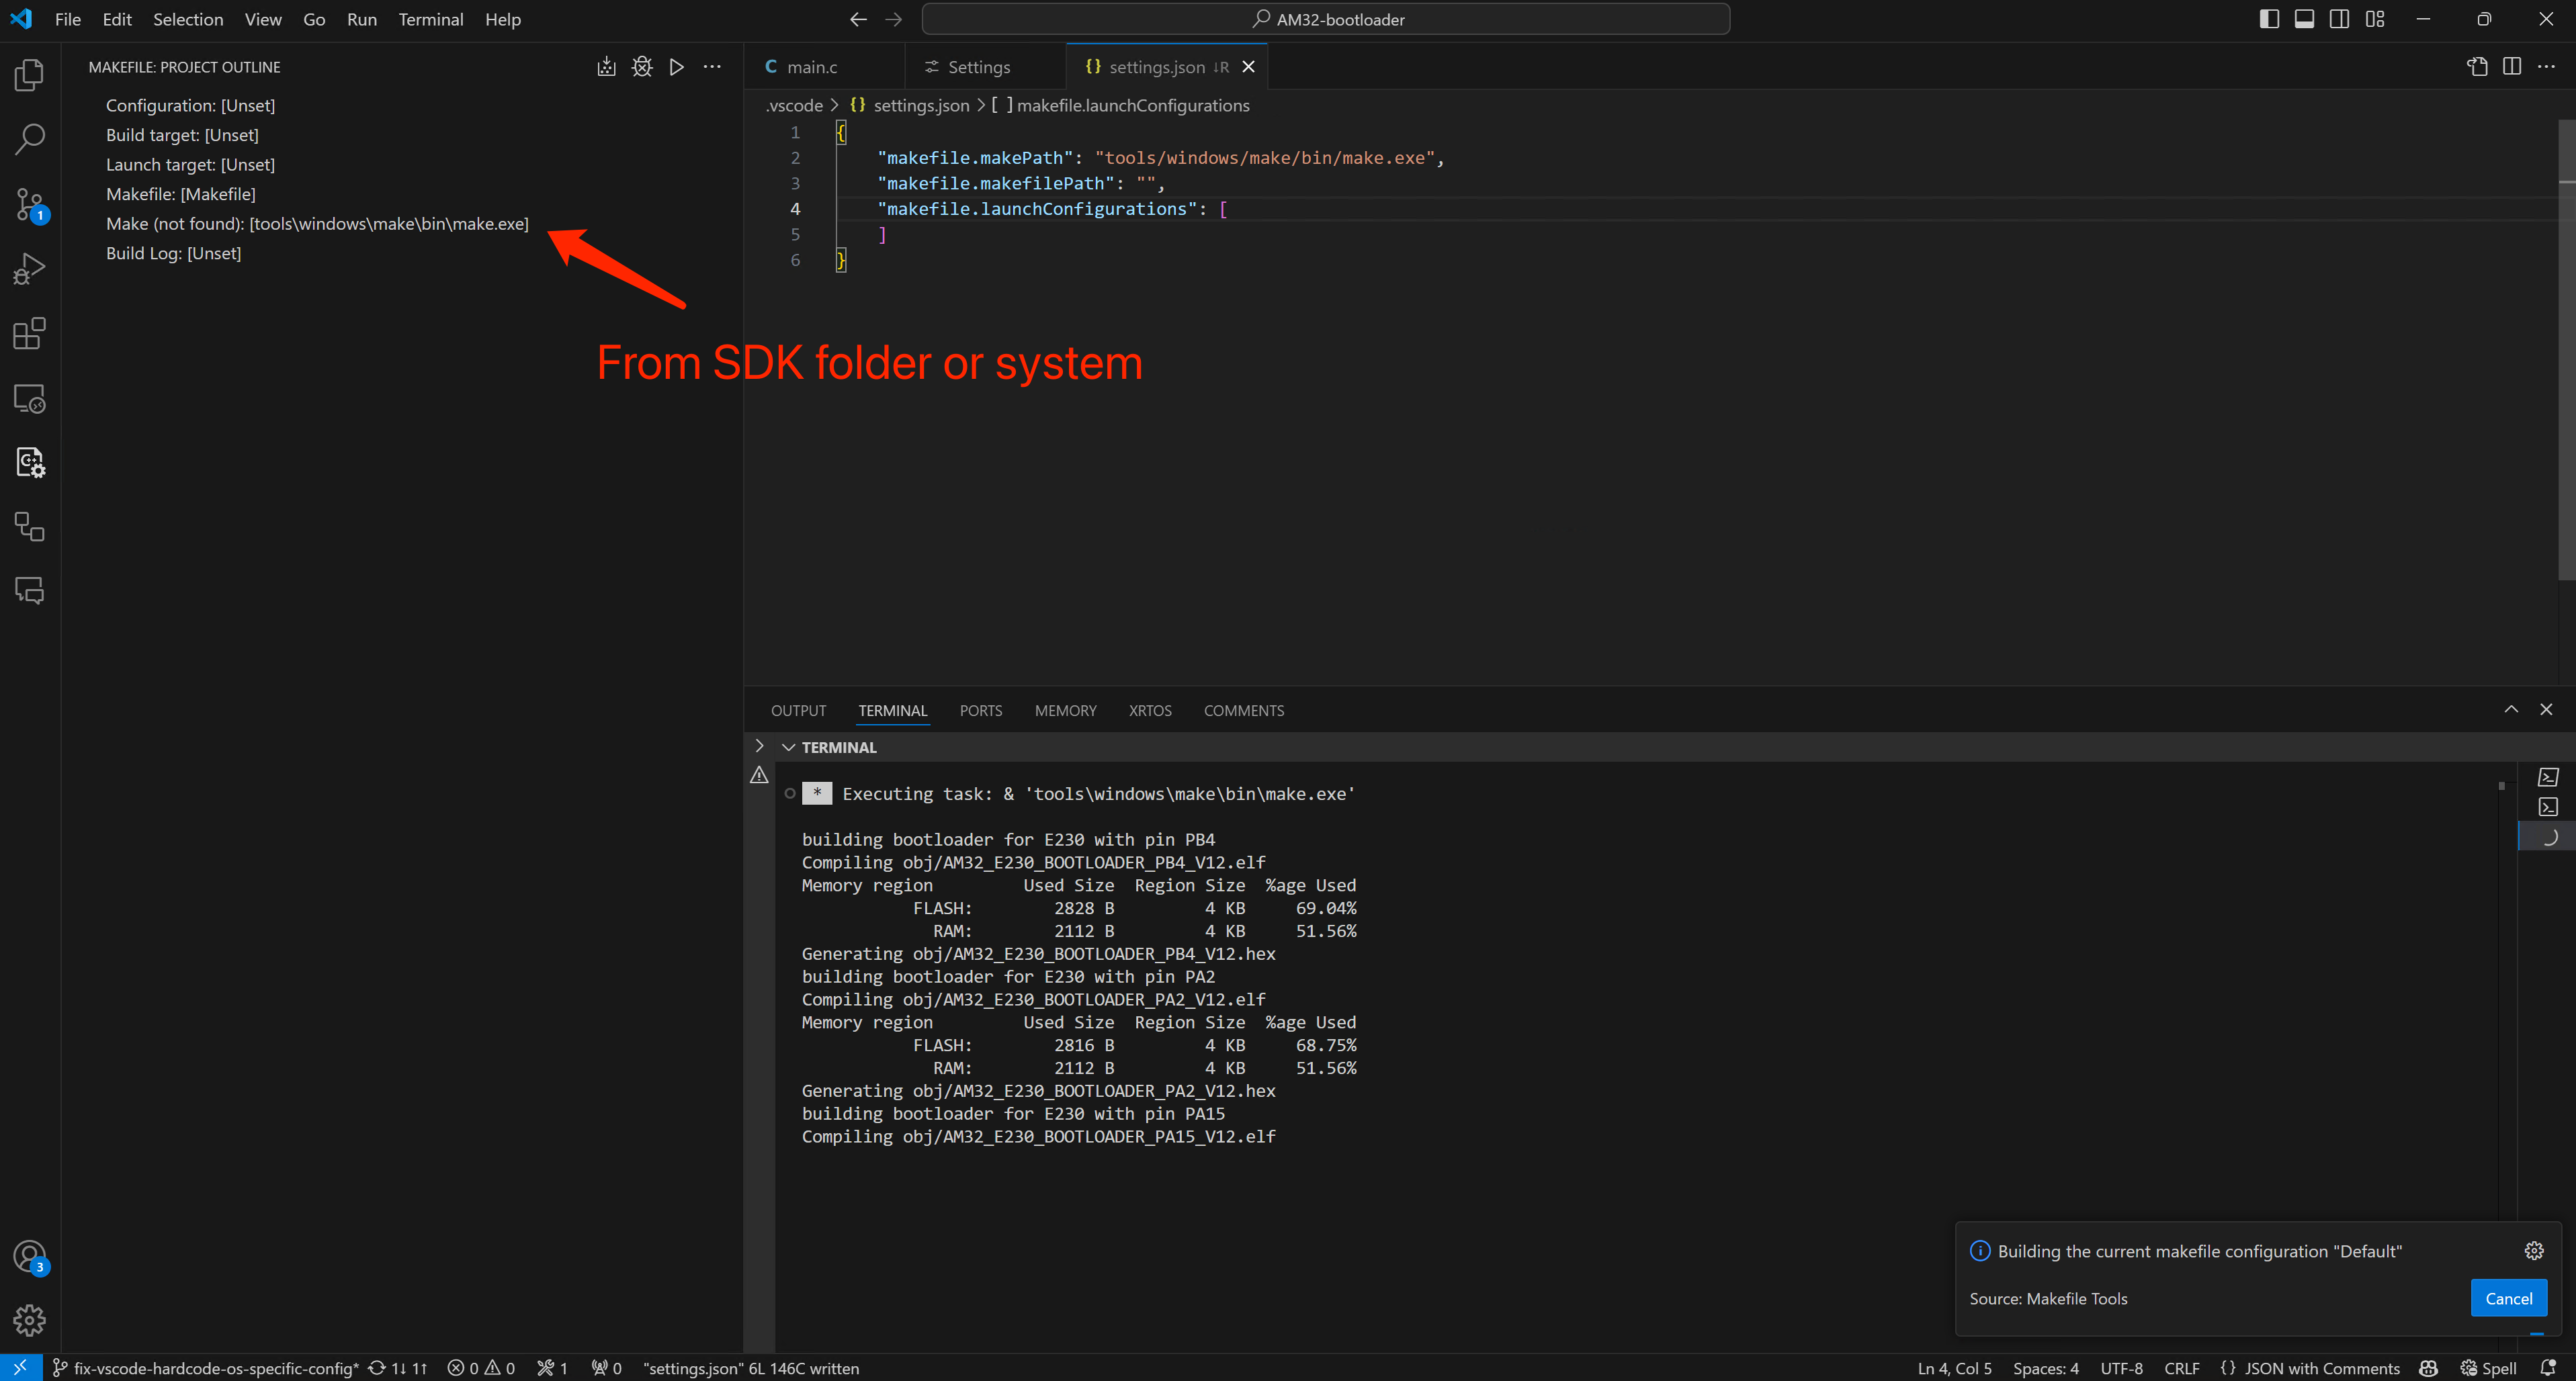
Install make if you don't have it, skip this if you want to use make from download sdk(only windows so far)
-
For vscode makefile-tools user

-
Download bootloader repo and install toolchain
git clone https://github.com/am32-firmware/AM32-bootloader.git
cd AM32-bootloader
make arm_sdk_install
make command fail
if you haven't setup you env path, you might not able to run
makedirectly
use full path instead, ie.
shell & 'C:\Program Files (x86)\GnuWin32\bin\make.exe' arm_sdk_installfor windows in powershell
/usr/bin/make arm_sdk_installfor linux/mac -
Build Target
outputmake AM32_L431_BOOTLOADER_PA2building bootloader for L431 with pin PA2 Compiling obj/AM32_L431_BOOTLOADER_PA2_V12.elf Memory region Used Size Region Size %age Used FLASH: 3156 B 4 KB 77.05% RAM: 2120 B 4 KB 51.76% Generating obj/AM32_L431_BOOTLOADER_PA2_V12.hexhow to know the target name?
the target name pattern is AM32_{MCU}BOOTLOADER{INPUT_SIGNAL_PIN}, reference to the pinout of Vimdrones ESC Development Board, we can know that the MCU is L431 and input signal pin is PA2, to list all targets use
make targets
using ls obj command we can see the building output files
AM32_L431_BOOTLOADER_PA2_V12.bin AM32_L431_BOOTLOADER_PA2_V12.elf debug.elf
AM32_L431_BOOTLOADER_PA2_V12.d   AM32_L431_BOOTLOADER_PA2_V12.hex openocd.cfg
-
Flash Target and Debug
- Open vscode and open the repo folder
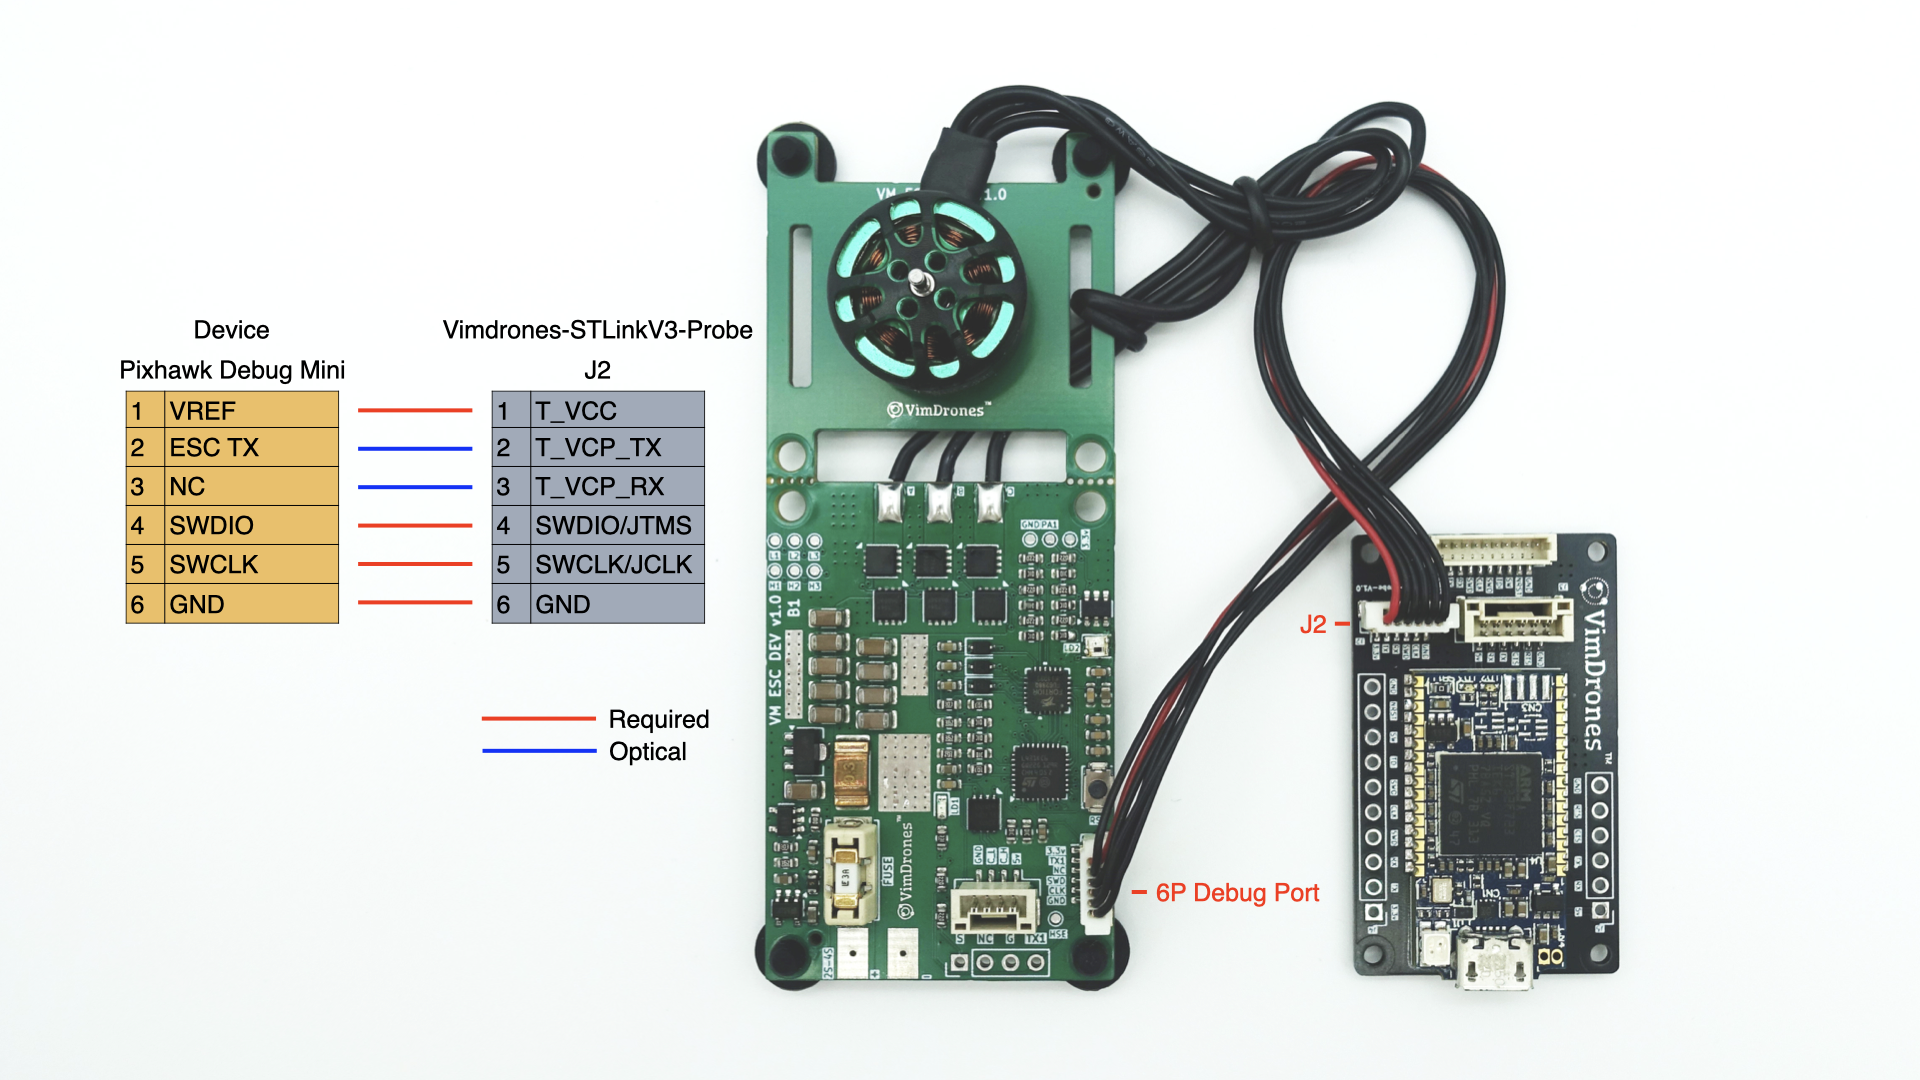
- Wring the Vimdrones ESC Development Board and Vimdrones Stlinkv3 Probe (any stlink should also works), connect stlink with USB and
power up the ESC Development Board with proper voltage, ie. 16.8V

- open
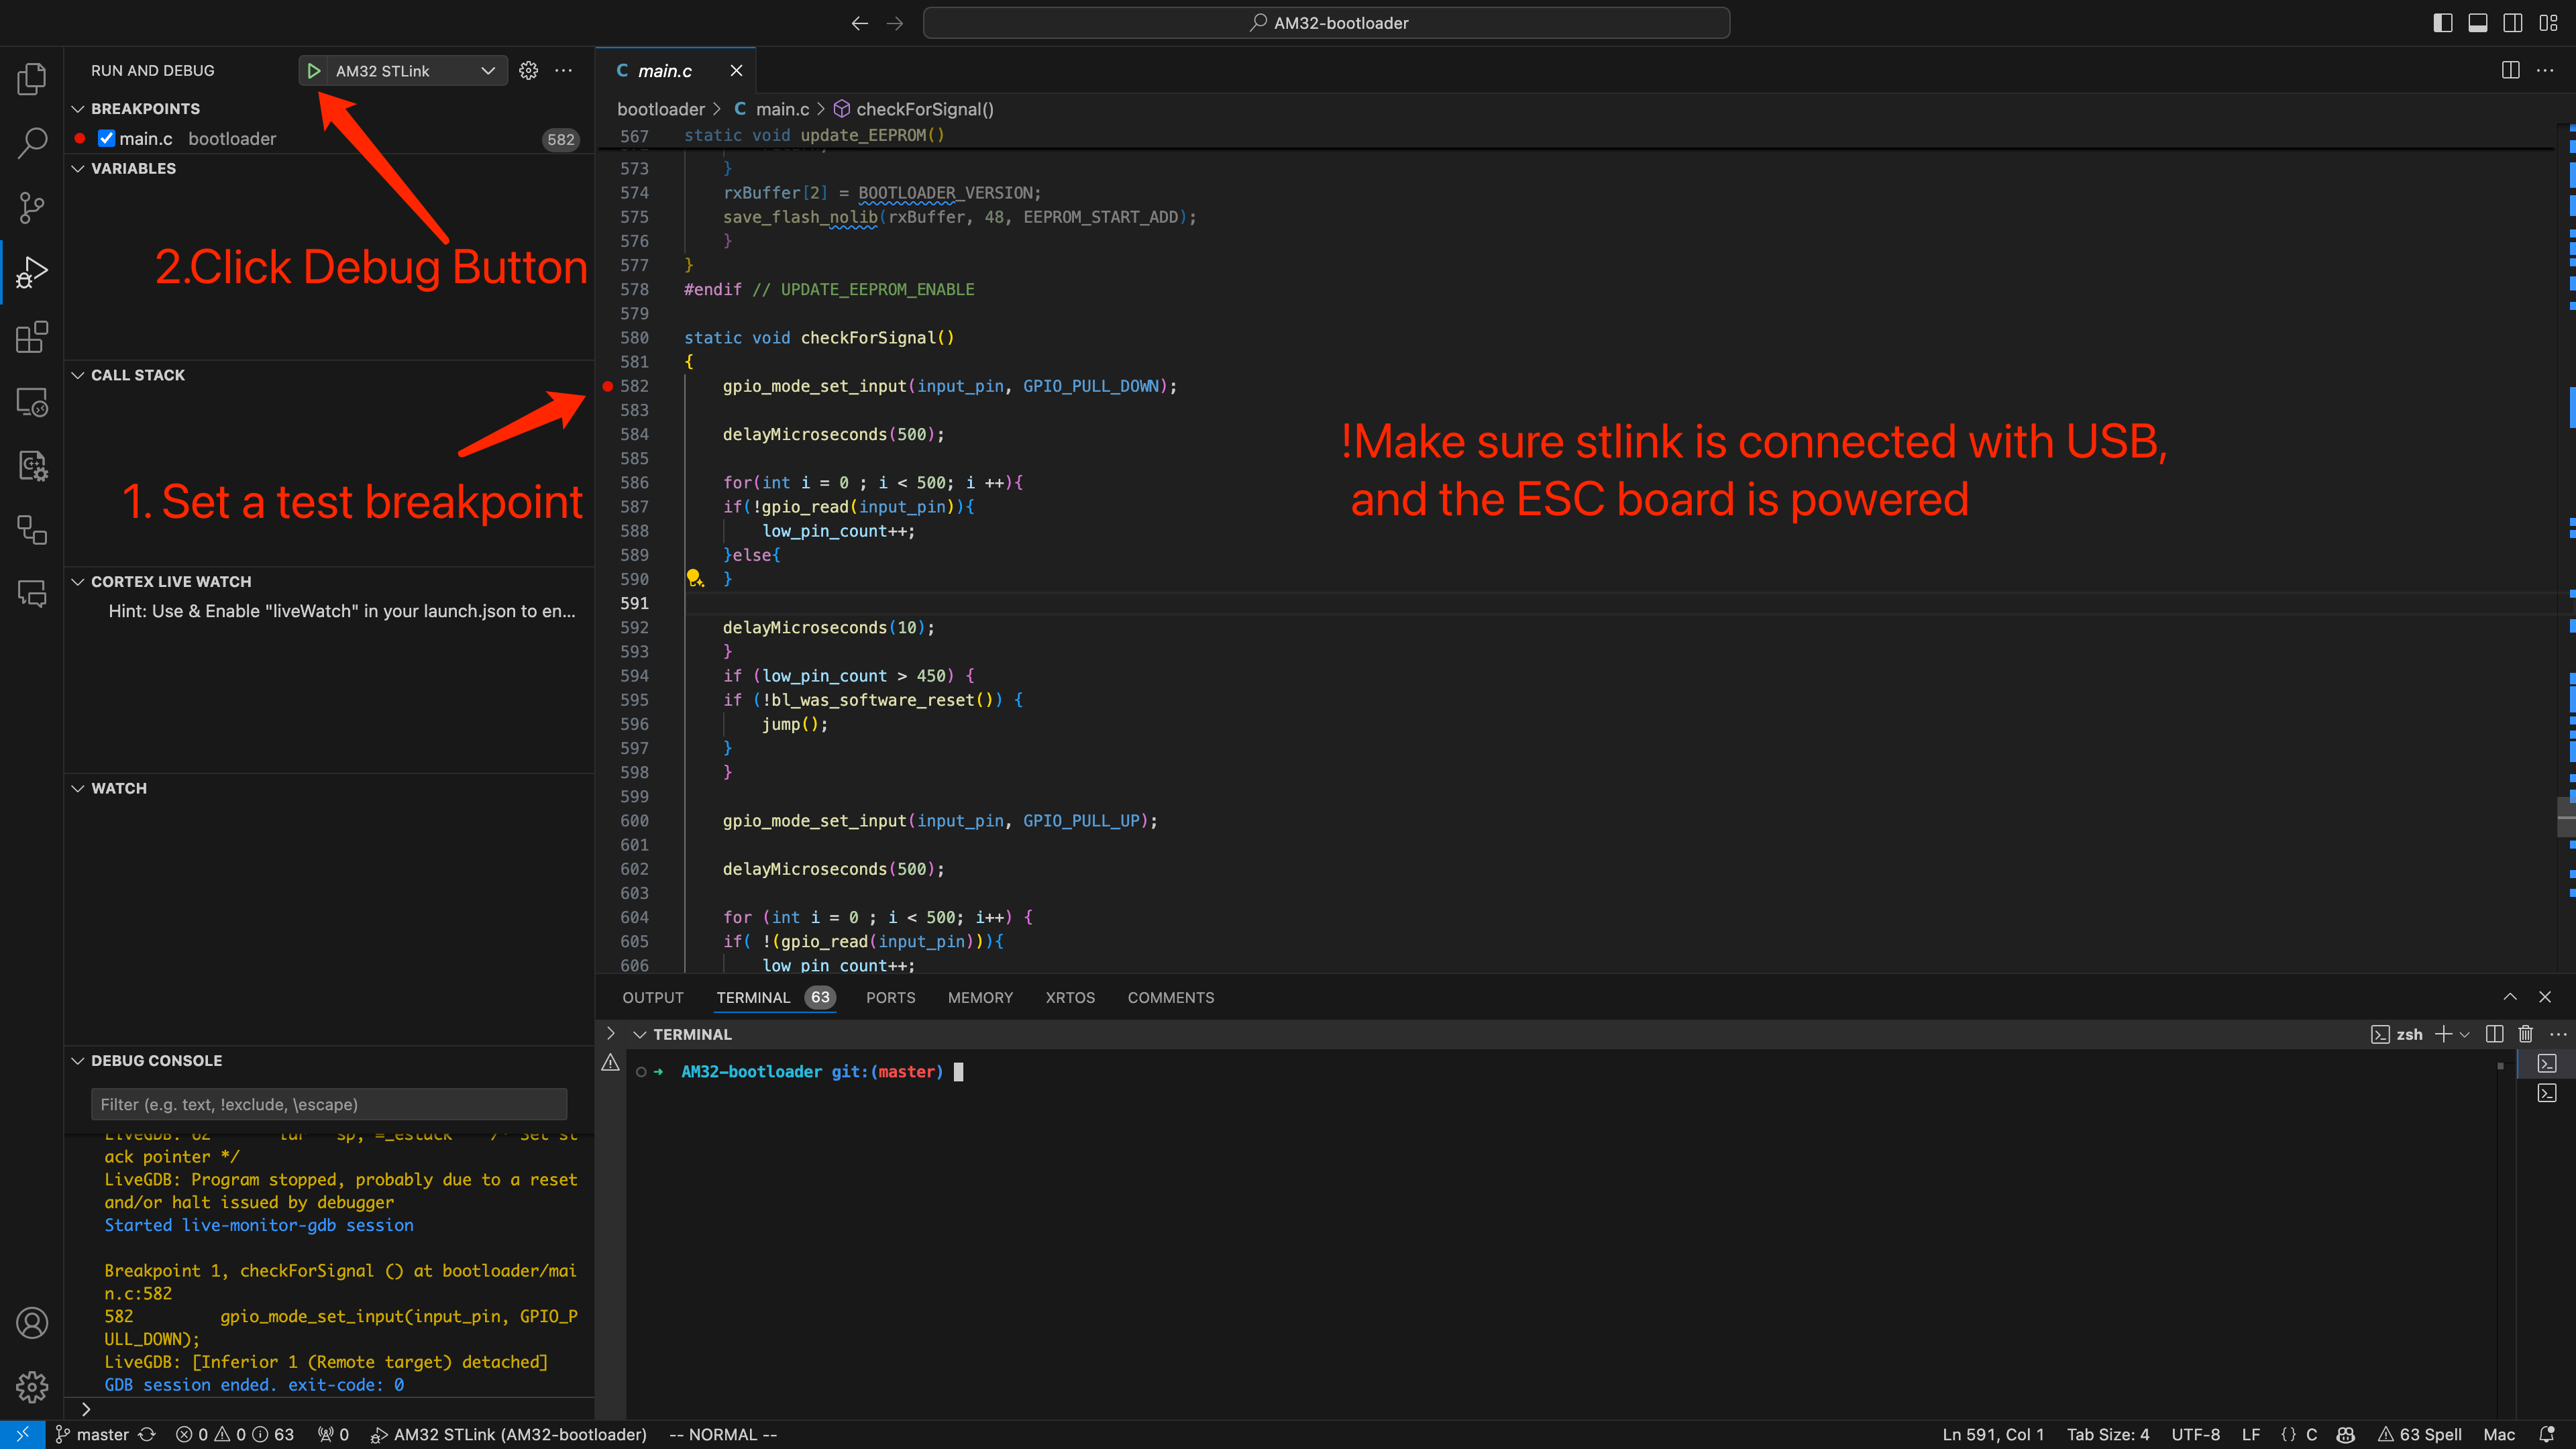
bootloader/main.cin vscode, set a test breakpoint and start the debug session
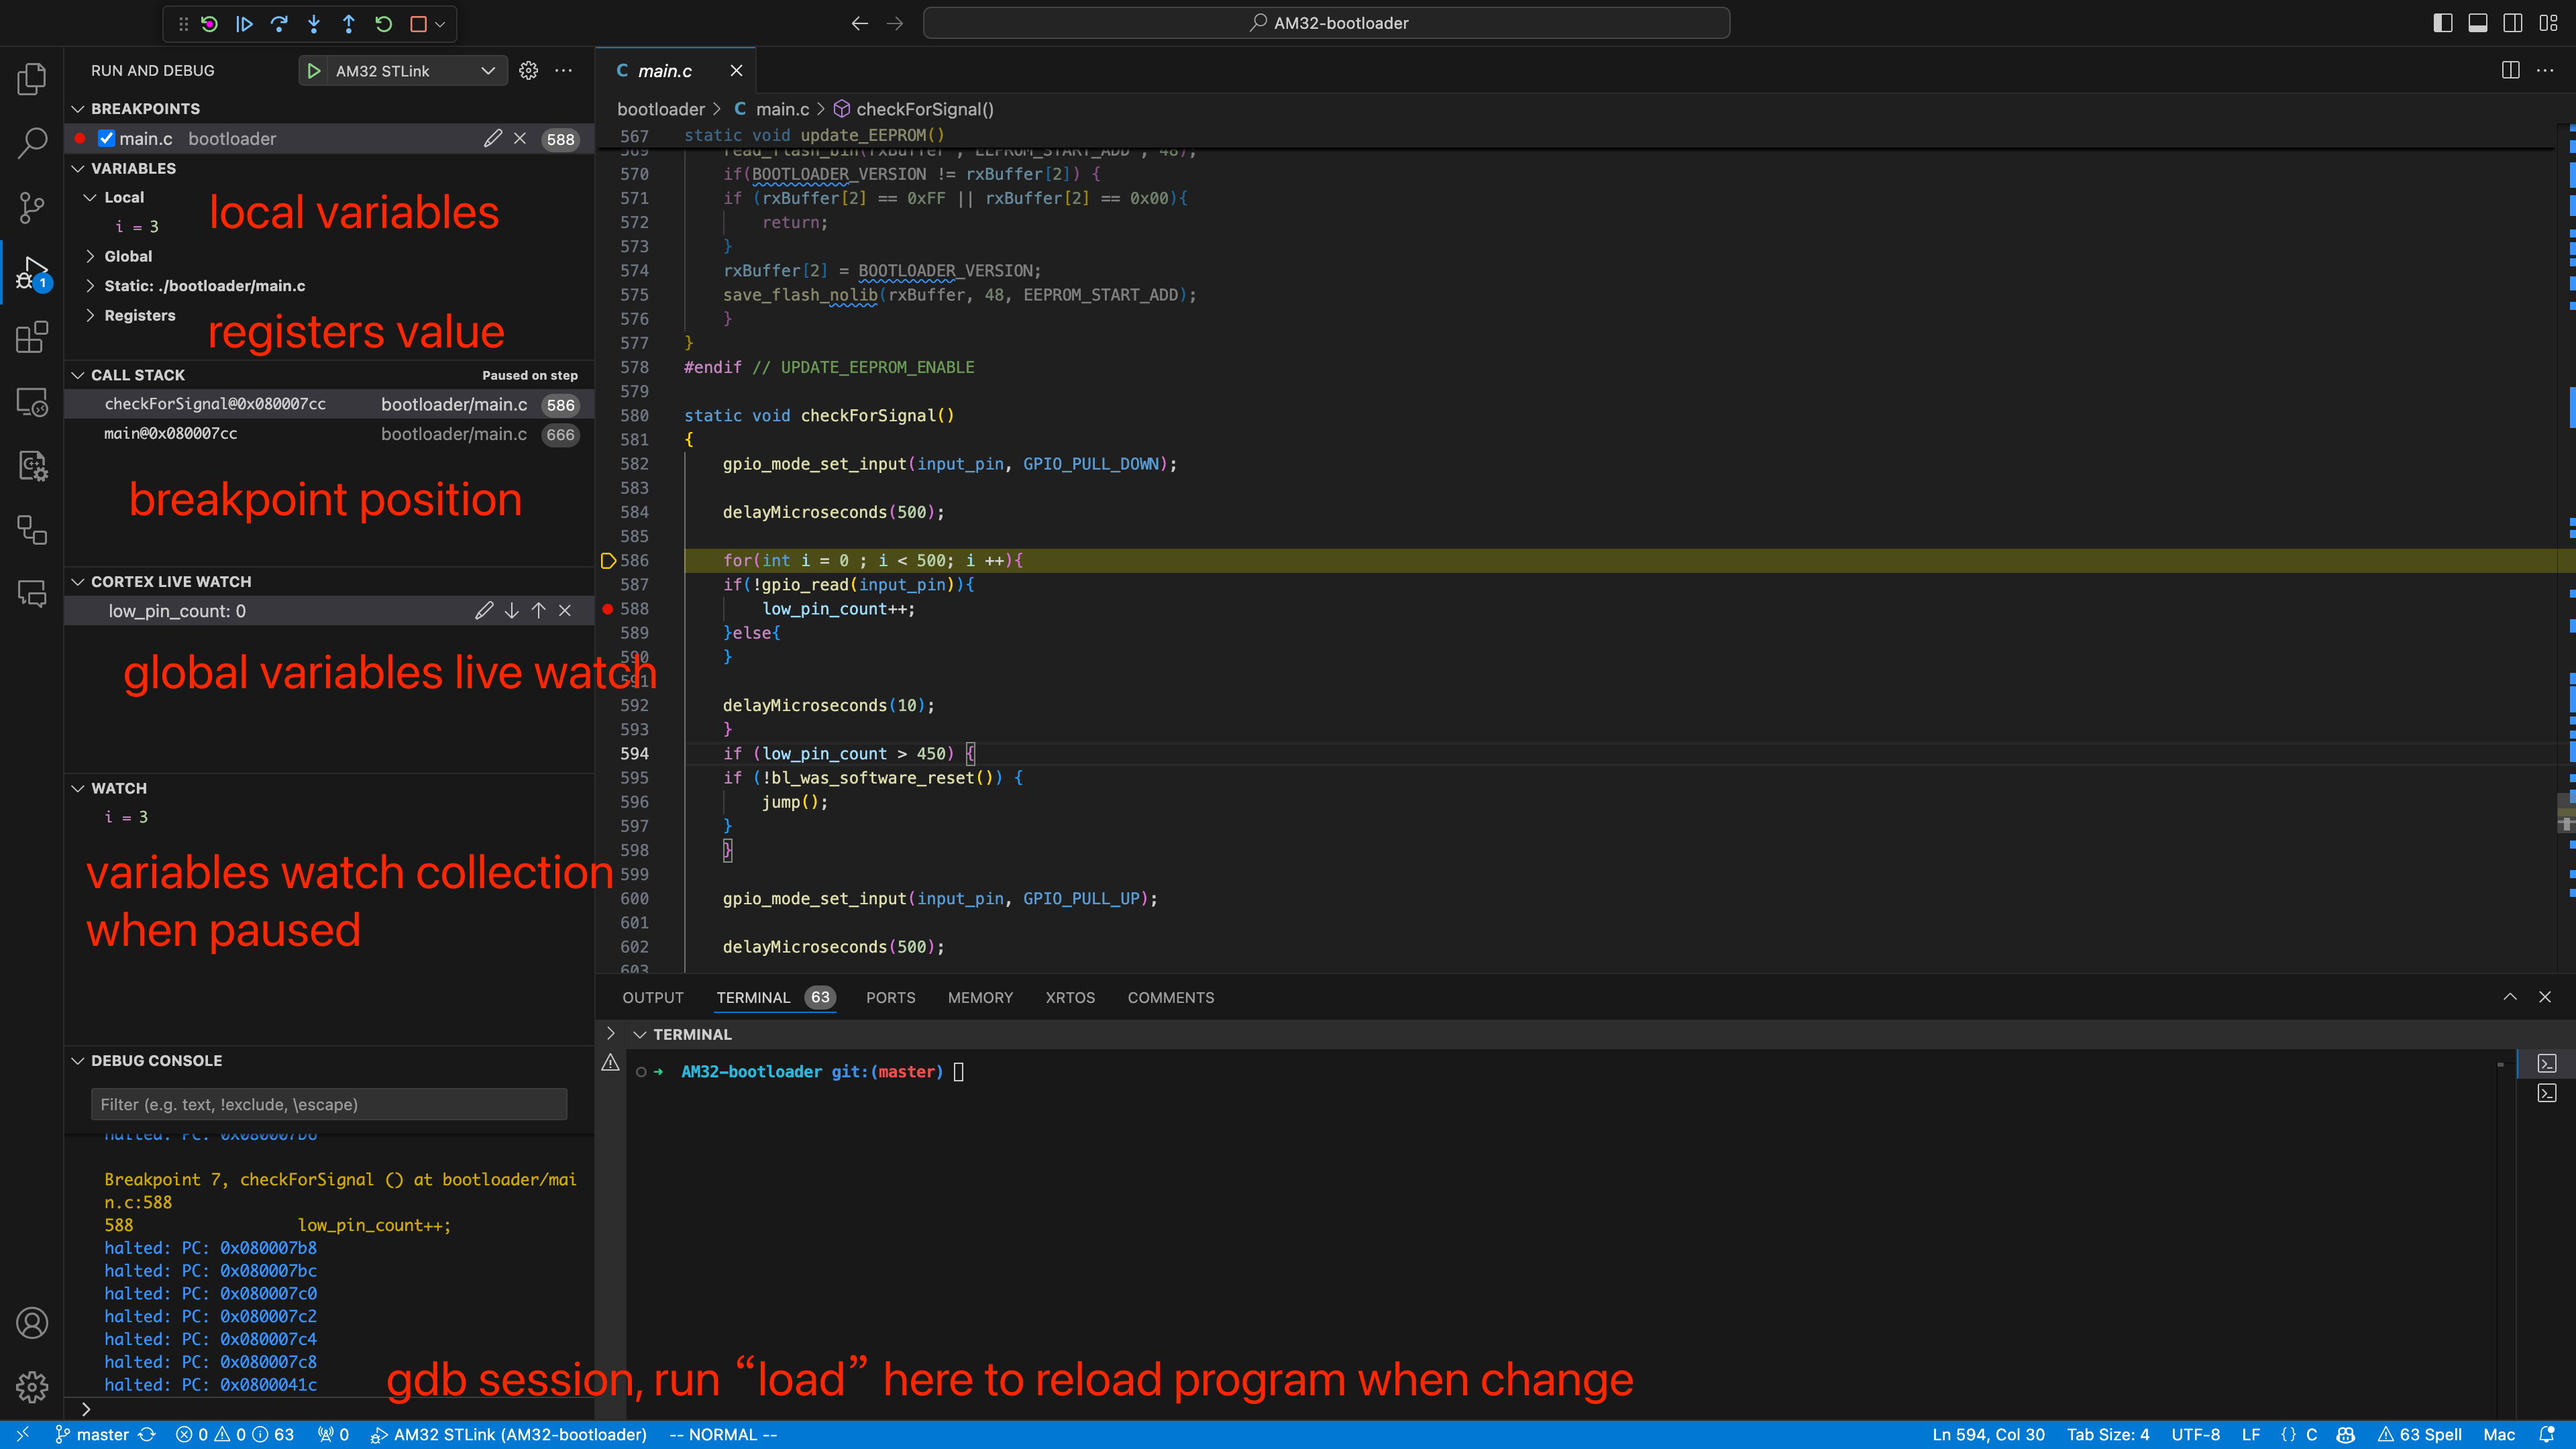
- vscode cotrex-debug overview

- now you can try to modify the code run
make AM32_L431_BOOTLOADER_PA2again and usingloadcommand in gdb shell session to upload your bootloader program and reload debug sission - enjoy!
-
AM32 bootloader usage
- after you upload the proper bootloader to the ESC board, you can not spin your motor yet, next step you need to flash the main AM32 firmware, but now you can try and test the bootloader function
- now you can using a betaflight flight controller as a passthrough, to connect the ESC board with config software, detail please visit AM32 Getting Started or AM32 offical page https://am32.ca
AM32 Main Firmware Build from source
default settings missing
make sure you have a default settings otherwise the bootloader will not jump into main firmware
if you don't how to connect AM32 with config tools please check the usage tutorial AM32 Getting Start , after connected with the config tool send default settings
another solution you can flash a downloaded eeprom.bin to the eeprom address, ie.
STM32_Programmer_CLI -c port=SWD -w eeprom_default.bin 0x0800f800 -rst
-
Build Environment Setup (Same as bootloader)
-
Build Target
make VIMDRONES_L431
Build Ready to use Firmware without using flight controller pass through
srec_cat ./AM32_L431_BOOTLOADER_PA2_CAN_V13.bin -binary -offset 0x08000000 -binary -offset 0x08001000 ./eeprom_default.bin ./AM32_VIMDRONES_L431_2.18.bin -binary -offset 0x08001000 -o all_in_one.hex -intel
how to get eeprom_default.bin?
eeprom_default.bin can be download from am32 web configurator or save from already working device